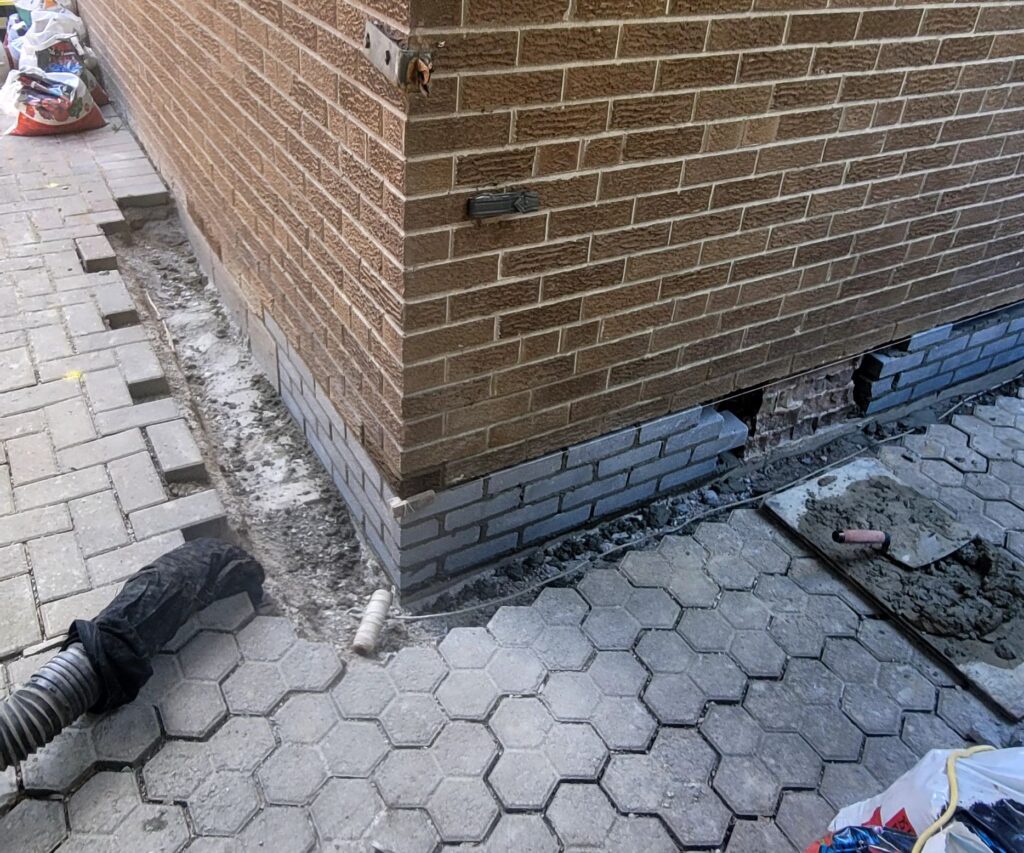
A common problem in Mississaua Oakville and Toronto is that the foundation is too low and the bricks are deteriorating, starting too low. How can this problem be solved, and is it worth putting in concrete bricks instead of regular bricks, or can they be reinforced later?
What you are referring to is a classic construction mistake in older houses (often found in buildings from the 1960s-1980s, including “cube” type houses), where the plinth area was poorly designed. Ceramic bricks, especially lower-grade ones, simply crumble (spall) when exposed to moisture from the ground and freezing cycles.
Here's how to approach this problem:
Is it worth replacing the bricks with concrete ones?
Yes, but with some reservations.
Concrete bricks (or concrete/foundation blocks) are much more resistant to moisture and compression than traditional red bricks. If you need to replace damaged sections of the wall at ground level:
Concrete blocks are the best choice. They have low water absorption and high strength.
Clinker brick: It is very durable and frost-resistant, but much more expensive. It is often used as a protective layer.
Concreting (rebuilding): Instead of inserting individual bricks, it is often better to cut out sections of the wall (step method) and pour reinforced concrete into the space, creating a so-called “raised foundation.”Repair methods (step by step)
If the foundation is too low, you have two main courses of action:
A. Raising the plinth (replacing the lower layers)
This is the most invasive but most effective method:
Section by section chiseling: Damaged bricks are removed in short sections (e.g., 1 meter) so as not to weaken the structure of the house.
Inserting horizontal insulation: At this stage, new heat-weldable roofing felt or thick foundation foil is laid.
Rebuilding: Concrete blocks are inserted in place of the old bricks or filled with concrete.
B. “Bathtub” insulation and lowering the ground
If you do not want to replace the bricks, you can try to isolate them from the source of the problem:
Lowering the ground level: If possible, remove the soil around the house to expose the foundation.
Perimeter drainage: Drain rainwater away from the walls to keep the ground around the bricks dry.
Waterproof screen: Install vertical insulation made of roofing felt/bituminous compounds up to a level of 30-50 cm above the ground.What about “reinforcement” (shotcrete/thickening)?
You mentioned “reinforcement” (probably meaning strengthening/thickening). You can make a so-called reinforced concrete jacket:
You dig up the foundation.
Drill holes in the existing foundation and insert reinforcing bars (anchors).
Add reinforcement and formwork for a new “wall” 10-15 cm thick, which overlaps the deteriorating bricks.
Pour concrete. This creates a new, tight, and strong barrier that takes over the load and protects the old brick.
Summary and recommendation
Replacing deteriorating brick with concrete or concrete blocks is a very good idea. Brick in the ground is always a ticking time bomb.
Important note: The order in which you do this work is crucial. Never dig up the entire house at once and do not knock down too long sections of walls, as the house may settle or crack. Work in sections of approx. 1-1.5 meters.
Are you planning to do this work yourself, or do you want to prepare guidelines for a construction crew?
We provide services in three cities: Mississauga, Oakville, Toronto.

Regularly checking the top of the chimney and flashing is crucial, as this is the most common place for leaks to occur in the entire roof.
Here are the main reasons why it is worth doing this:
- Protection against flooding and mold
Leakage:
Even a small leak in the flashing allows water to flow directly into the house, causing stains on ceilings and walls.
Rotting roof trusses: Moisture getting under the sheet metal destroys the wooden roof structure and insulation (mineral wool), which drastically reduces the energy efficiency of the building.
Mold:
A damp wall near the chimney is an ideal place for fungi to grow, which pose a threat to the health of the household. - Preventing the chimney from “bursting” (frost cycle)
Water that penetrates the gaps between the sheet metal and the brick freezes in winter. Ice increases in volume, leading to cracking of joints, bricks, and crumbling of the chimney cap. Regular inspection (preferably after each winter) allows for minor repairs with sealant before the entire chimney requires costly rebuilding. - Fire safety and patency
Condition of the cap:
If the concrete “top” of the chimney cracks, debris can fall inside, blocking the flue or ventilation duct.
Flue gas tightness: A leaky chimney poses a risk of carbon monoxide or fire escaping into the house. - Saving money
A minor repair of the silicone seal or re-hammering roofing nails costs pennies. A complete replacement of the flashing or rebuilding of a damaged chimney is an expense of several thousand zlotys.
Roofers and masons recommend having an inspection once a year, preferably in the fall before the heating season or in the spring after the worst frosts.
We provide services in three cities: Mississauga, Oakville, Toronto.
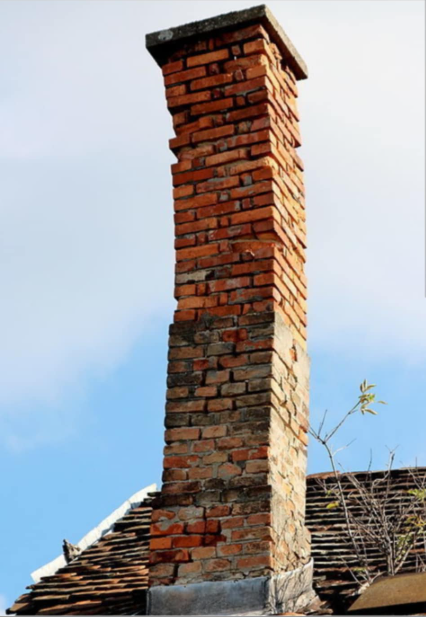
Is a crooked chimney in Mississauga and Oakville dangerous, and how much time do I have to rebuild it?
A crooked chimney is a structural hazard. This is no joke - if the chimney has clearly deviated from the vertical, time is working against you.
Why is it dangerous?
- Risk of collapse: A chimney is a huge mass (several hundred kilograms to several tons). A tilt means that the center of gravity is off-axis. Stronger winds, water-soaked bricks, or a shock can cause it to collapse onto the roof, piercing the ceiling or injuring someone below.
- Duct leakage: When a chimney tilts, cracks form inside. Carbon monoxide or sparks can escape through these cracks into the house, posing a risk of attic fire.
- Roof damage: As the chimney “works,” it tears apart the aforementioned flashings, causing immediate and massive flooding of the house.
How much time do you have?
It depends on the cause, but in construction, three scenarios are assumed:
Immediate mode (days/weeks): If the cracks are fresh, wide, and you can see that the chimney is “working” (the gaps are getting bigger), you need to act immediately. Call a chimney sweep or builder to assess whether the chimney needs to be demolished urgently.
One season (months): If the chimney has been crooked “forever” (old construction errors) but is airtight and stable, you theoretically have time until next summer. However, winter is the worst time – frost in the cracks will accelerate the destruction process.
Until the first inspection: Building regulations require annual inspection of chimney flues. When a chimney sweep sees a crooked chimney, they are required to take it out of service, which means no more burning in the stove/fireplace.
What to do about it?
Usually, a crooked chimney cannot be “straightened.” There are two solutions:
- Demolition and rebuilding: Demolish the part above the roof and rebuild it (the safest option).
- Reinforcement with a steel structure: Sometimes steel corsets are used, but this is a temporary solution and often more expensive than replacing the bricks.
My advice: Don't wait until winter. Go up to the attic and see if there are any cracks where the chimney passes through the ceiling. If so, call a professional today.